We had a lot of people over for the Super Bowl. When you’re an expat, things that remind you of home become more important than ever before. People who have zero interest in the Super Bowl when they lived in the States are now suddenly really excited about the game. And I took that as an excuse to have a party! I served Carla’s salsa recipe and her caramelized onion & goat cheese dip, which were big hits. My guacamole was gone by halftime (I MADE IT WITH TEN AVOCADOS. TEN!).
While the food was great, I honestly think one of the highlights was the personalized drink markers (the game itself certainly wasn’t one of the highlights…)! One of my pet peeves with big parties is losing track of your drink. I don’t love the idea of accidentally picking up someone else’s beverage and taking a swig, so I try to avoid this at all cost! And while it may seem crazy to spend time on drink markers, I think it was worth it. And besides, they’re reusable! So I can pull them out next time we have these people over.
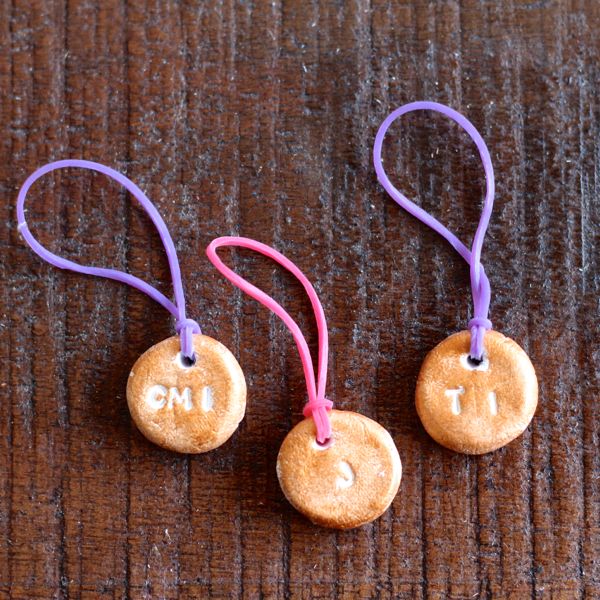
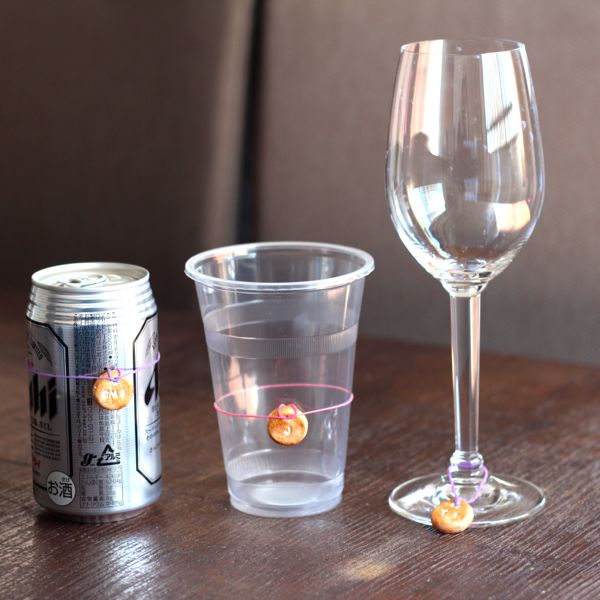
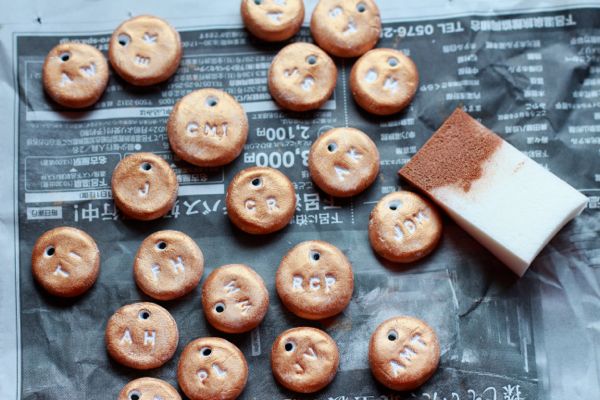
We asked our guests to B.Y.O.B., since we provided the food. This meant we had to be prepared for all sorts of serving containers: cans of beer, bottles of beer, mixed drinks in plastic cups, and wine glasses. The best way to attach something to all of these options was with a rubber band. I made little pendants out of air-dry clay, stamped initials into them with my alphabet stamps (which I’m slightly obsessed with), painted them, then enlisted in help from my patient husband and a very sweet friend to help me string them onto the rubber bands. They’re so cute!
And there are so many options. You could use colored clay and save yourself the painting step (although I like the brushed metallic look that I got with a makeup sponge). If you have small cookie cutters, you could cut fun shapes out instead of doing rounds. If you’re really patient, you could even make small figures and insert an eye hook!
DIY Personalized Drink Markers
You’ll need:
Clay
Alphabet stamps
A pointed object to make a hole in the clay (I used a wooden skewer)
Paint and a makeup brush or a foam craft brush
Rubber Bands
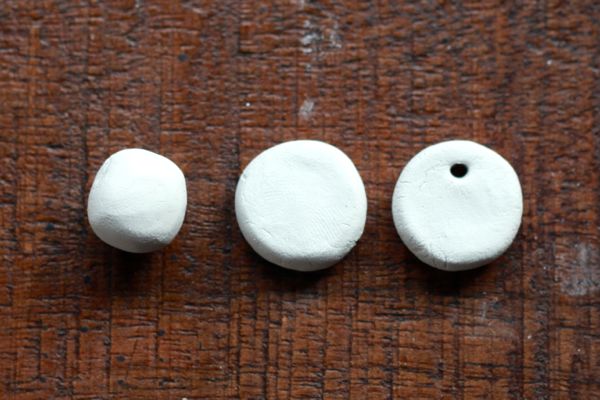
1. Create a small ball of clay by rolling it between your hands. Flatten into a disk by pressing it onto your work surface. Use the skewer to poke a hole into the top of the disk. Make sure it’s big enough to fit the rubber bands through it (I made mine too small and it was really difficult to string them!).
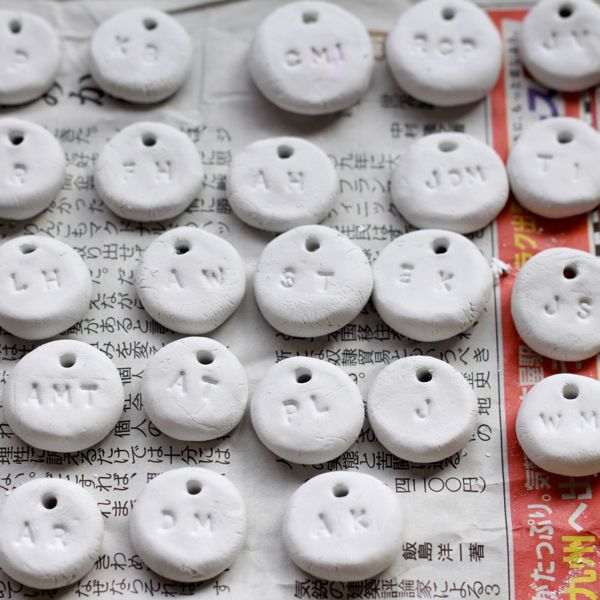
2. Stamp your guests’ initials into the disk. Use the instructions for your specific clay to dry the clay out. Mine was air-dry clay, so I waited overnight at this point. But you can speed up the process with an oven-bake clay, such as Sculpey or Fimo.
3. To achieve the brushed metallic look like my charms have, I used a metallic bronze acrylic craft paint and a makeup sponge. I applied a small amount of paint to the sponge and dabbed it over the charm. This ensured that the paint wouldn’t get into the stamped initials and they would remain a contrasting color. Let the paint dry.
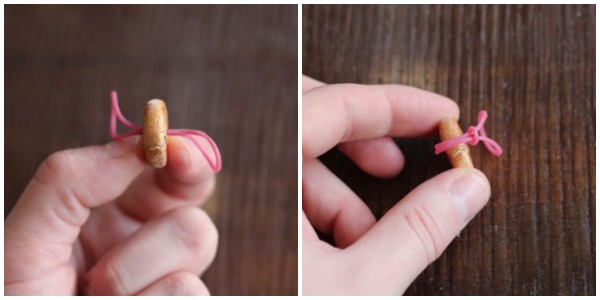
4. When your paint is dry, string the rubber bands through the hole in the charms and finish with a lark’s head knot. Now they’re ready to use!
