When I was pulling my third batch of Cocoa Pumpkin Spice Granola out of the oven recently to fulfill a few requests, I realized I was going to need to plan for this to be a popular homemade gift over the next couple months. Granola is a great gift because it fits so perfectly inside a simple jar, which is then easily spruced up with a ribbon or a handwritten tag- or both!
If you aren’t already in the habit of saving all your glass jars, you should start! Wash them out, peel off the labels and store them open for a few days to get rid of any food smells. They’ll work great for storing bulk spices, packaging leftovers or transforming into the perfect DIY project for a special someone!
Even if you don’t save your jars, the fact that glass items are inexpensive and readily available means that you have lots of options for packaging homemade goods. And one of my favorite ways to jazz up glass? Etching cream! All you need is a creative design idea and about five minutes to create a one-of-a-kind container that won’t be stored away with all the other seasonal tins.
DIY Etched Gifting Jars
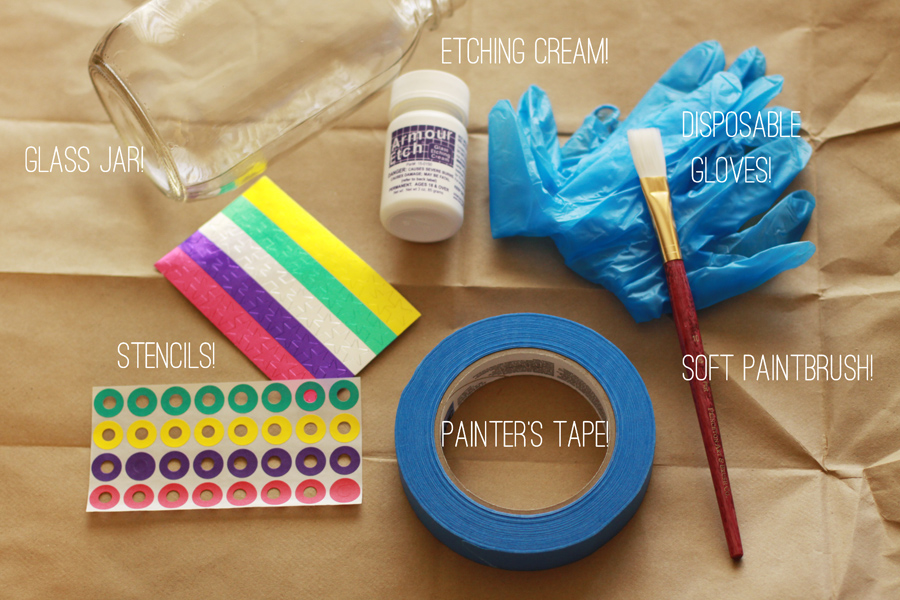
- glass jar(s)
- etching cream
- soft paintbrush
- disposable gloves
- adhesive design tools: stickers, painting tape, stencils, etc. (The binder paper reinforcement stickers make great polkadots! If you want to create your own stencil, I’d buy some contact paper and use an exacto knife!)
- as needed: Goo Gone (or another adhesive remover, this works great for peeling labels off your jar or removing residue once you’ve finished your design.) Nail Polish Remover (Do you have any ink lettering on your glass? Companies often stamp Sell By or Best By dates right on the bottle itself, but this can be taken care of quickly with a q-tip and the nail polish remover!)
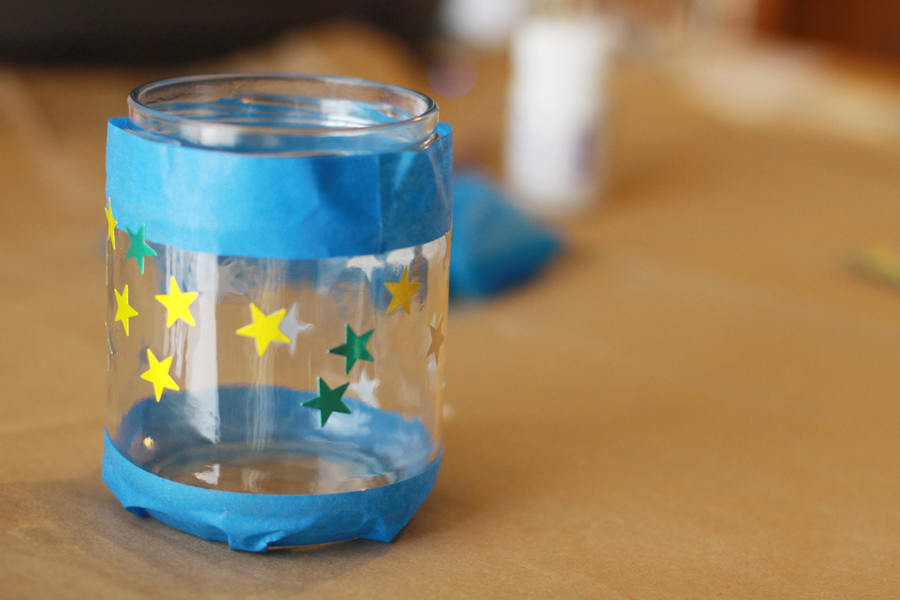
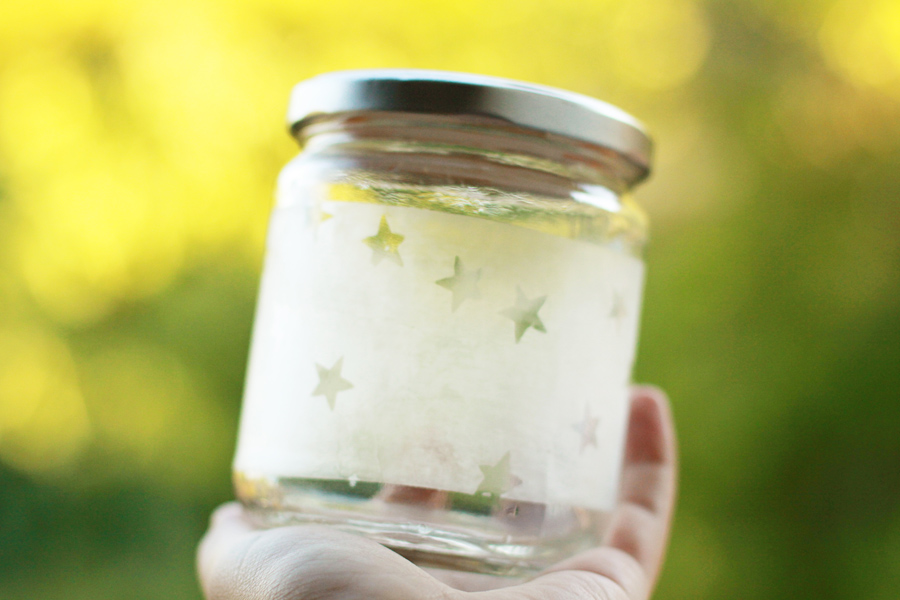
Start by creating your design with your adhesive items! I used painters tape to define the etching area and star stickers to create a pattern. Ensure that you really press on all the edges of your tape/stickers since you won’t want the etching cream to creep under them.
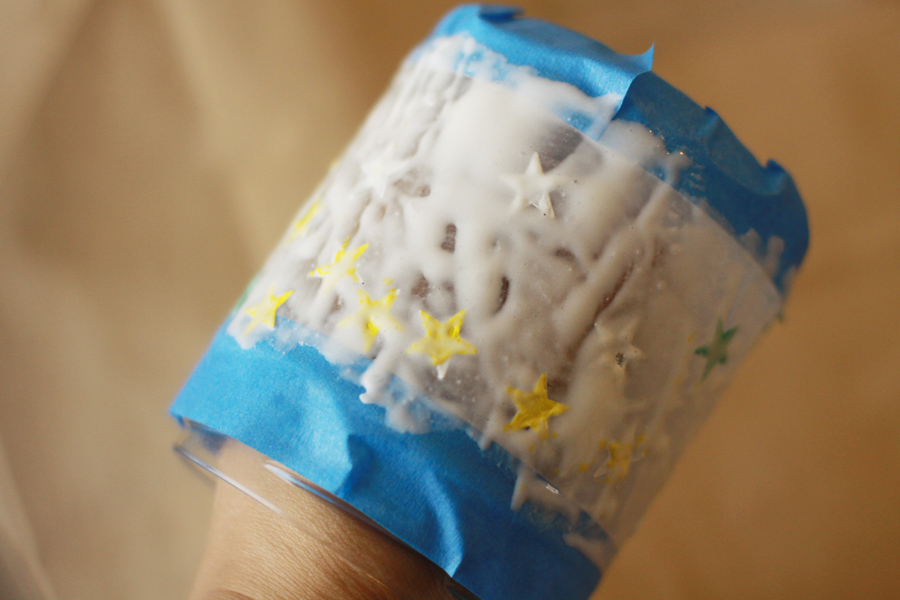
Paint on your etching cream with the soft paintbrush. Depending on the size and shape of your glass container, you may want to put on your gloves at this point. Cover the area with a THICK LAYER- you don’t want the cream to dry unevenly as it will cause inconsistencies in your etched area. (The thick white areas in the below photo? Perfect! I had to go back and cover the thinner areas after shooting the photograph.)
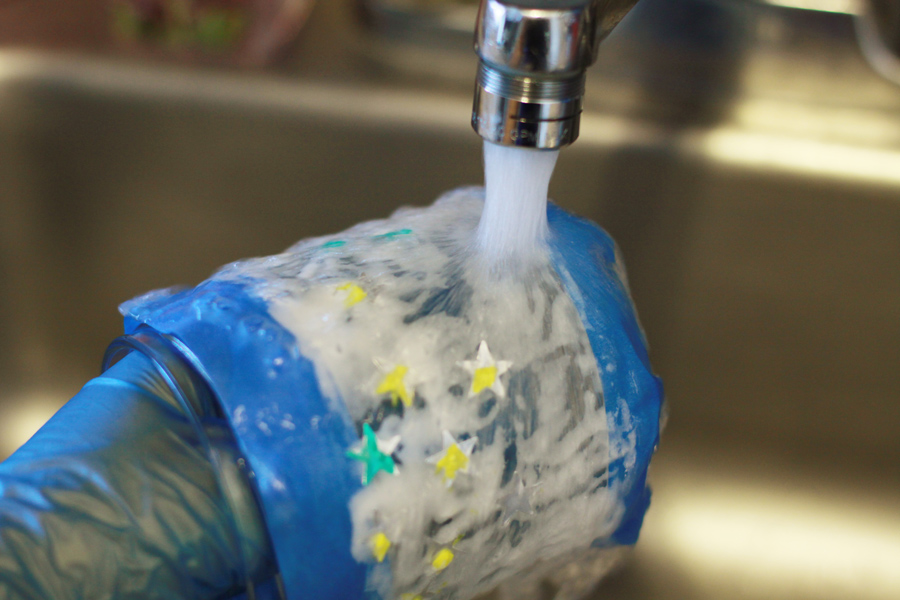
Etching cream works essentially immediately, but for certain stencils the etching cream directions suggest waiting up to five minutes. At this point you will definitely want to throw on those gloves to avoid a chemical burn as you head to the sink to rinse off the cream. I use pretty warm water, both to make it easy to rinse off the cream and to start to loosen the adhesive I’ve applied.
If you’re lucky, the tape and stickers will come off super easily right during the rinsing process! If not, just peel them off once the cream is gone (I keep my gloves off for this, just in case). Any residue is easy and safe to wipe off with Goo Gone.
This little jar (recycled from salsa!) is all set to hold the product of my niece’s new obsession with folding origami lucky stars- I thought the motif would be fun and apropos.
The design possibilities are so endless- I’ve got an assembly line of taped up jars in various stripe and swirl patterns just waiting for etching cream! I can’t wait to tailor the look of each jar based on the gift receiver and the contents.
The next challenge? Paring down the long list of treats I want to fill them with!

I just love this project and tutorial! And I would love to feature on my Mason Jar Crafts Love blog! Just one picture and a clear link back to you. Let me know if it’s okay. I don’t feature anything without permission first.
Thanks so much for your consideration!
🙂 Linda
absolutely! we love love love mason jars here! we’re very happy to discover your blog, too.