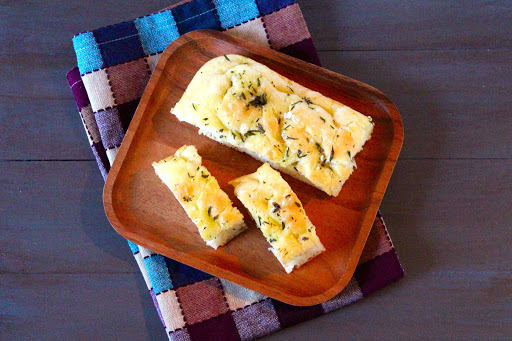
Our apartment in San Francisco was a few blocks away from Liguria Bakery in the North Beach neighborhood. This bakery exclusively makes focaccia, which is so delicious and popular that they usually sell out by 10 am. They use a variety of toppings, such as green onions, thick tomato paste, garlic, and olives. Rosemary is my favorite, but it also must be everyone else’s favorite since it’s usually the first to sell out!
Now that we live over 5,000 miles from that fantastic bakery, we miss their focaccia like crazy. I made it my mission to figure out how to make a focaccia that we like as much as Liguria’s. It took a few tries, but I came up with something that I think is pretty close. In fact, we like it so much that I make it almost weekly!
I can’t tell you how easy this is to make. Baking bread from scratch can seem overwhelming and messy, but this recipe doesn’t even require kneading it by hand as long as you have a stand mixer with a paddle attachment. Your hands will hardly even get dirty! And trust me, the heavenly smell of freshly baked bread in your home will make it worth every single second. Oh yeah, it also tastes amazing.
You can get so creative with the toppings here, too! There are endless combinations. Caramelized onions, kalamata olives, goat cheese…gah! I’ll be honest, I am so in infatuated with the rosemary version that I haven’t branched out at all. But I swear, someday I will…
While your active time with this recipe is minimal, it does take some time for the dough to go through its rising cycles. Just make sure you start the recipe 3-4 hours before you want to eat the bread. And here’s a tip: this bread is best the day it’s made. Make it earlier in the day rather than later so that you leave yourself plenty of time to eat as much of it as possible! If you do have leftovers, the texture gets a little spongier. Just pop the bread in the oven for a few minutes to crisp the top a little bit, rather than eating the bread at room temperature.
I know that using yeast can be intimidating. But as long as you follow the recipe and use water at the right temperature, you should be fine. Too much salt or sugar can kills yeast, so don’t go off-recipe with those ratios. And in order for yeast to bloom properly (at least the dry active yeast called for in this recipe), your water should be between 105 and 115 degrees Fahrenheit when you add the yeast itself. Yeast dies at 120 degrees, so just be careful that your water isn’t too hot! Too cold and it won’t activate. You’ll know within ten minutes whether it’s working or not. When you add the yeast to the water, it should “bloom” or create a foamy-looking mass on the surface of the water. And it will smell “yeasty.” If this doesn’t happen, something went wrong and you just need to try again. And if you are really that afraid of yeast, then try Carla’s biscuit recipe!
Last note: Focaccia is traditionally baked in sheet pans. The pan that I use is an odd shape because I have a weird oven. Just make sure the surface area is 130-180 square inches (surface area is length x width, just in case you forgot!). Mine is 132 square inches and creates a really tall focaccia. A bigger surface area will yield flatter bread.
Wondering what I mean by “weird oven?” Japanese kitchens don’t traditionally have ovens. They have fish broilers and stovetops, but no ovens. This was unacceptable for someone who likes to cook as much as I do, so we bought a counter-top oven. It looks like a glorified toaster oven, but it’s actually a really fantastic convection oven with a variety of settings. We named ours “Bree,” since it’s made by Breville. Bree and I are in love. Don’t judge. She toasts, roasts, bakes, reheats, and keeps food warm. She has settings for bagels, pizzas and cookies. She is a total rockstar, even if she’s a little on the small side.
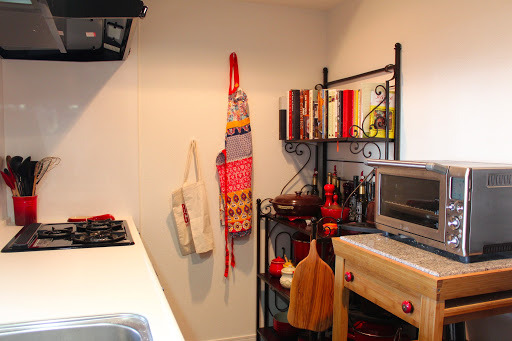 |
| My kitchen |
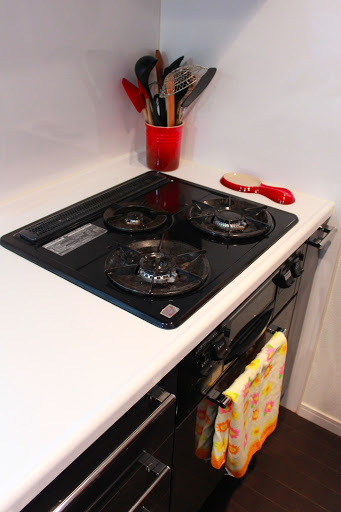 |
| My stovetop with 3 burners. The little window under the counter is the fish broiler! The space where the oven should be? Just a pull-out drawer. |
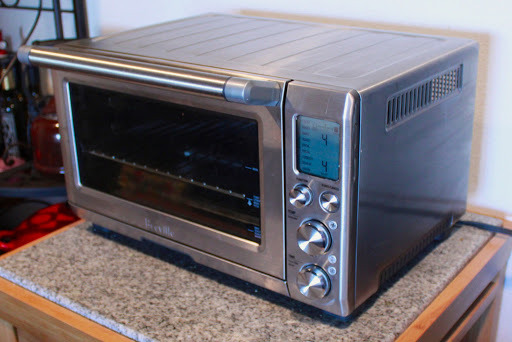 |
| Bree + Alyssa = true love forever |
Rosemary Focaccia
2014-03-16 23:21:57
Ingredients
- 2 cups water, 105-115 degrees Fahrenheit
- 2 teaspoons dry active yeast
- 2 teaspoons salt
- 4-5 cups of flour (I use all-purpose and can’t honestly give you advice for using any other type of flour)
- Olive oil (probably ¾ cup or so? Depends on how generous you want to be with the oil)
- 2-3 tablespoons chopped fresh rosemary
- 2-3 tablespoons flaky sea salt, such as Maldon
Instructions
- Use the paddle on your stand mixer.
- Add water to bowl of stand mixer, making sure it’s the right temperature even after you add it to the bowl (if the bowl is cool then it can lower the temperature enough that your yeast might not bloom). Run the mixer for a few seconds to dissolve the yeast into the water. Let sit for 10 minutes. Make sure your yeast has bloomed, otherwise start again!
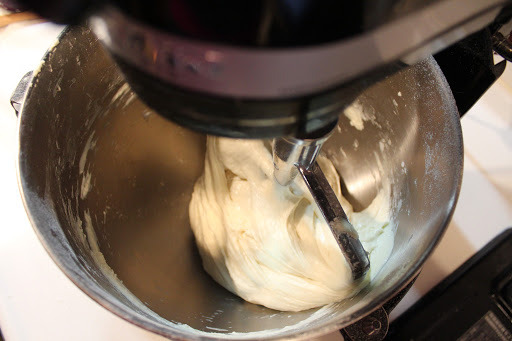
- Add salt and flour to the yeast/water mixture with the mixer on medium speed. Add 4 cups of flour 1 cup at a time. Then if necessary, add 2 tablespoons at a time of the remaining cup of flour until the dough pulls away from the bowl, becoming elastic.
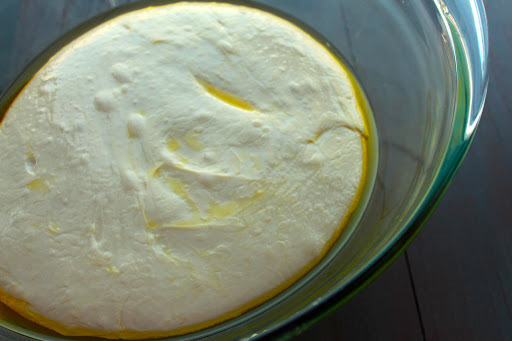
- Coat a large bowl with olive oil. Use a spatula to move the dough from the mixing bowl to the olive-oil coated bowl. Turn the dough in the bowl to cover with oil. Cover with a towel and let rise in a warm, dry spot until dough doubles in size. This should take 60-90 minutes.
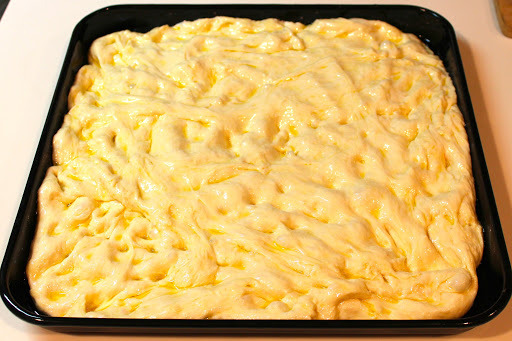
- Coat your baking pan with oil. Transfer the dough to the baking pan. Punch down the dough, spreading it out to roughly fill the pan. Let rise in a warm, dry place until the dough doubles in size. This should take 45-75 minutes.
- Punch down the dough one more time. Let rise 30 minutes in a warm, dry place.
- Preheat oven to 450 degrees.
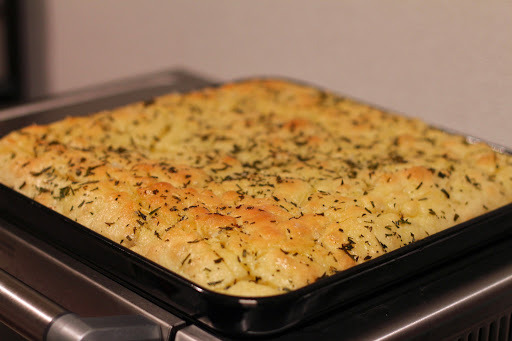
- Use your fingers to make indentations in the dough (this will make crevices to catch the yummy olive oil, rosemary and salt!). Drizzle with 3 tablespoons of oil and sprinkle chopped rosemary evenly over the surface. Bake for 20-25 minutes, until the surface is golden-brown.
- Brush the remaining oil over the top of the bread with a pastry brush. Sprinkle the flaky sea salt over the surface. Cut and serve warm. Try not to eat the entire pan!
Adapted from The dough is based on an ancient Bon Appetit Recipe from Lidia Colavita (of Colavita olive oil), but the technique is mine.
Adapted from The dough is based on an ancient Bon Appetit Recipe from Lidia Colavita (of Colavita olive oil), but the technique is mine.
Alyssa and Carla https://www.alyssaandcarla.com/
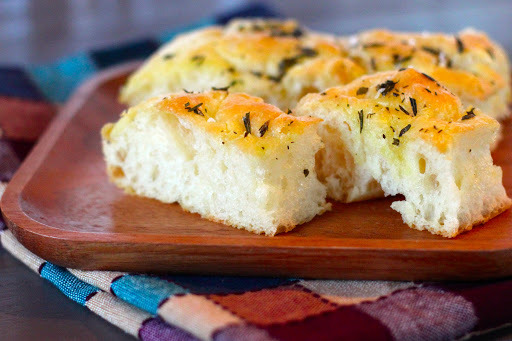




Wow, just cut into mine. You are right, very hard not to eat the whole tray.
So glad you liked the recipe! Thanks for trying it 🙂
I love your pictures and recipes. I'd like to inform you of a great new website http://www.foodieportal.com. I would like to invite you to come and join us and share your wonderful pictures with us. We are simply foodies and we are not photography snobs, so picture perfection is not important, all we care about is delicious food.
I made this! Turned out amazing and was such a big hit with the fam :)Great work on developing the recipe.
I made this for the fam and they loved it! You did a fantastic job developing the recipe 🙂
Thanks, Cort! I'm so glad you enjoyed it 🙂